In one of our previous blogs we explained the importance and value with DMARC. This article will explain how to deploy DMARC with our Halon SMTP software. In addition to implementing this in your Halon, you need to be able to add text records to your domain’s DNS server for which you want to protect with DMARC.
SPF record
The first step of deploying DMARC is to make sure that you have a working SPF record for your domain. When you’ve added your SPF record it could look something like this
example.com. 300 IN TXT "v=spf1 +mx -all”
It’s important that your SPF record contains all IP addresses that should be allowed to send emails from your domain.
DKIM signing
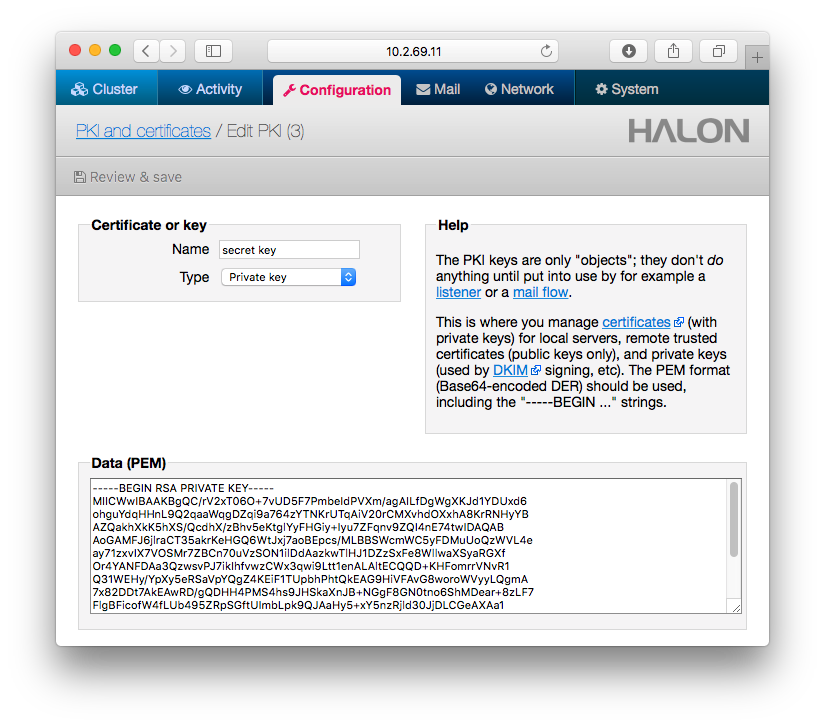
The next step is to implement DKIM signing for your domains. Start by creating a private key with type RSA 2048 then add the key to your Halon system. Halon SMTP software allows you to store the key in your configuration under PKI and certificates. You can also store the key on an external database that you can query using API calls. It’s important that you keep this key private at all times as it protects the integrity of your signature.
Once you’ve created your private key and added it to your Halon you’ll have to add the signing function as the last action in your outbound DATA flow (as specified by the relay table). You can do this by adding the pre-defined DKIM delivery block, or a script that invokes the DKIMSign function. One way to invoke the DKIM function for all exit paths is to override the built-in Deliver() function.

The selector is an identifier for the key you currently using, this allows you to rotate keys, but still keep the old once for a while. So when you update the key, you should also update your selector. You can use whatever selector you want as long as it’s a valid subdomain name.
The domain defines which domain that guarantees the integrity of the message, depending on your implementation this can be either a domain of your choice (example.com) or $senderdomain. The simplest approach to deploy DKIM is to use a single domain.
The private key should be the key that you added to your Halon system in the previous step.
Each one of the domains you want to sign with a DKIM signature should have a TXT record providing the public key in their DNS zone.
As you can see in the picture above, there’s a link called “Generate and check” which is a helper function to generate the TXT record. Here’s an example of what the DNS record could look like:
example._domainkey IN TXT "v=DKIM1; k=rsa; p=MIGfMA0GCSqGSIb
 3DQEBAQUAA4GNADCBiQKBgQC/rV2xT06O+7vUD5F7PmbeIdPVXm/agAILfDg
 WgXKJd1YDUxd6ohguYdqHHnL9Q2qaaWqgDZqi9a764zYTNKrUTqAiV20rCMX
 vhdOXxhA8KrRNHyYBAZQakhXkK5hXS/QcdhX/zBhv5eKtglYyFHGiy+Iyu7Z
 Fqnv9ZQI4nE74twIDAQAB"
Once you’ve added the TXT record, you should verify that your public keys looks correct. You can do this by running the following command (with your own selector and domain) in the terminal
host -t txt selector._domainkey.example.com
or if you are using windows
nslookup
 set q=txt
 spaceship._domainkey.example.com
Signing with external keys
You can use use an external source to store your private keys, this can be useful if you want to sign more than one domain or if you use different private keys for different domains. One way to do it is with a trusted variable such as a SASL username. The script example below illustrates how a system can fetch DKIM keys from a database using external API calls with an SASL username as a parameter.
$dkim = api_call("?type=dkim&user=$1&domain=$2", [$saslusername, $senderdomain]);
if (is_array($dkim))
DKIMSign($dkim["selector"], $dkim["domain"], $dkim["rsakey"]);
Publishing your DMARC records
Before you instruct other servers to reject email that violate DMARC, we strongly recommend that you test it first. Enable DMARC in testing mode by adding a TXT record like the example below
_dmarc.example.com. 300 IN TXT "v=DMARC1; p=none; rua=mailto:dmarc@example.com"
This will send a report to see how many DMARC rejects you produce. Make sure that the reports looks correct and then start to reject emails by changing p=none to p=reject.
Verify messages with DMARC
The last thing you need to do is to make sure that you verify inbound messages with DMARC. You can do this by adding the pre-defined “Verify sender” block as the first action in your inbound DATA flow (as specified by the relay table).

If you prefer to use scripting instead of the pre-defined blocks here’s an example on how to do this with a script that invokes the ScanDMARC function
$dmarcresult = ScanDMARC();
	if (is_array($dmarcresult))
		foreach ($dmarcresult as $dmarcdomain => $dmarcpolicy)
			if ($dmarcpolicy == "reject")
				Reject("The messages violates the DMARC policy of $dmarcdomain ($messageid)");
You’re now fully protected with DMARC which prevents scammers from abusing your domains. This contributes to better secure emails for senders and receivers, protects users and brands from painfully costly abuse.